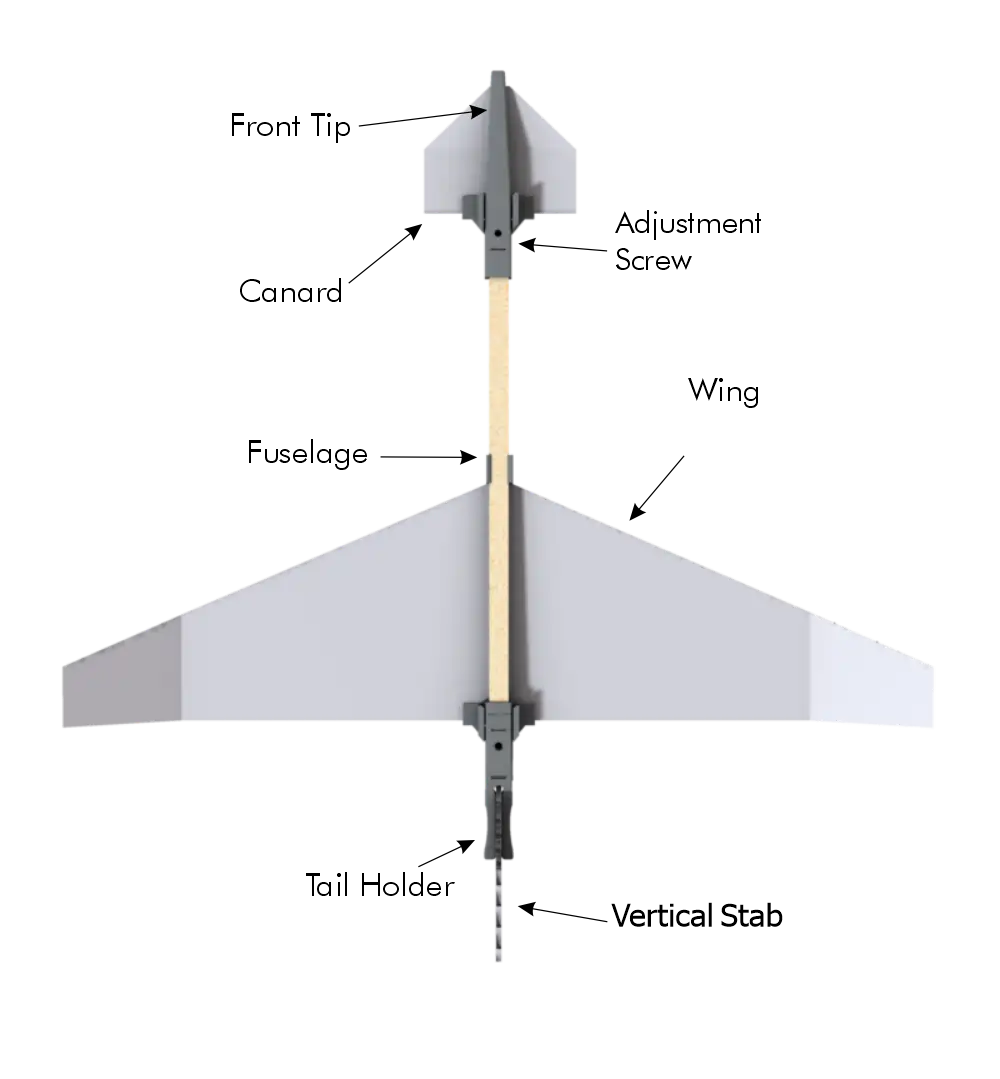
Your Cruzer Kit includes
- 1 Fuselage
- 1 4 3/4” X 14” Coroplast sheets
- 2 Green wire 18” inches long.
2 Universal Tip - 1 Control Surface Template sheet
- 1 Front tip/ Canard Holder
- 1 Tail Holder
- 2 Wing/Canard Adjuster
- 1 Middle Wing Clip
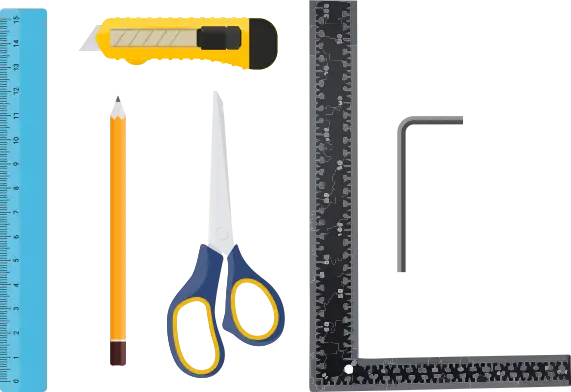
Tools Needed
- Pencil
- Scissors or Hobby Knife
- Ruler or Square
- 2.5 mm Allen Wrench
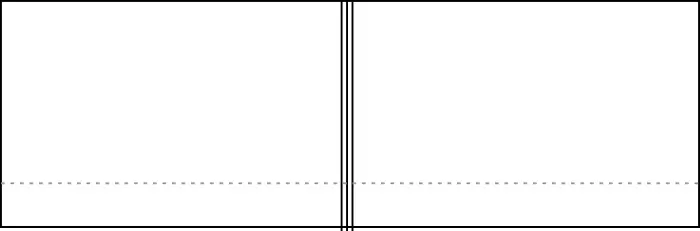
From the left hand side of the Coroplast sheet measure 7” to mark the center of the sheet. Lightly draw a line down the center of the sheet.

Your content goes here. Edit or remove this text inline or in the module Content settings. You can also style every aspect of this content in the module Design settings and even apply custom CSS to this text in the module Advanced settings.
Using a straight edge, draw a line 1” from the bottom of the substrate.
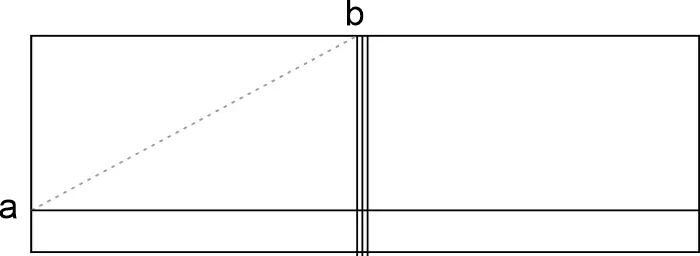
Using a straight edge, draw an angled line between point a and point b.
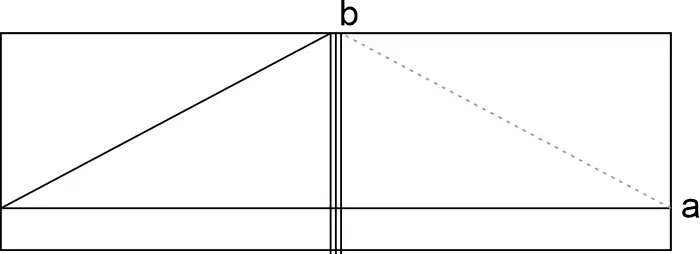
Repeat on the other side
With a pair of scissors cut along the diagonal lines. Remove and save the smaller pieces for the vertical stab and canard.
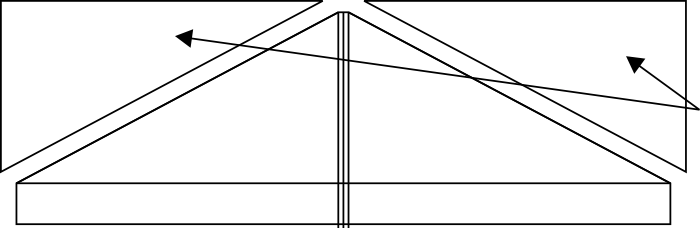
Save small pieces for the Canard and Vertical Stab
Insert two 18” pieces of wire in the wing flutes #2 and #8, counting from the trailing edge of the wing. Cut the wire to ensure the wire will not to extend past the wing.

Insert two 18” pieces of wire in the wing flutes #2 and #8, counting from the trailing edge of the wing. Cut the wire to ensure the wire will not to extend past the wing.
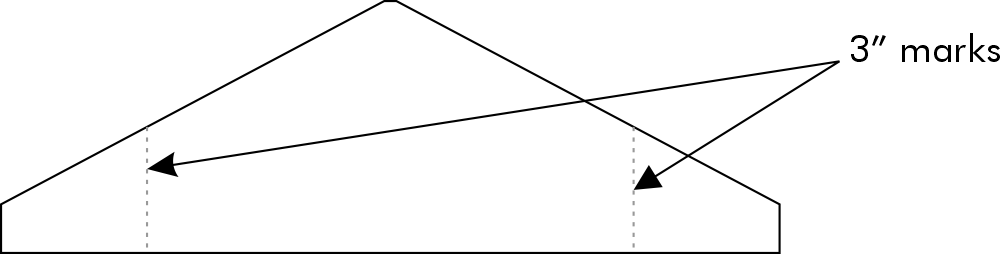
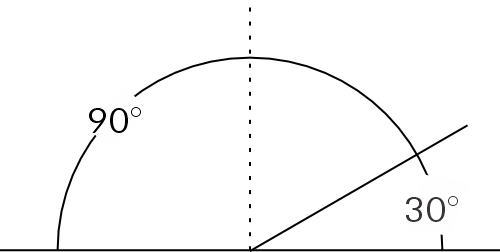
Now it is time to bend the winglets. Lay the wing on a table and extend the wing tip past the table edge about 3”. Lay a square or a ruler along the same pencil line from the above step. Pushing down on the ruler with one hand and bending the wing tip up with the other. Bend each winglet to 90 degrees. For flight, bend winglet back down to 30 degrees.


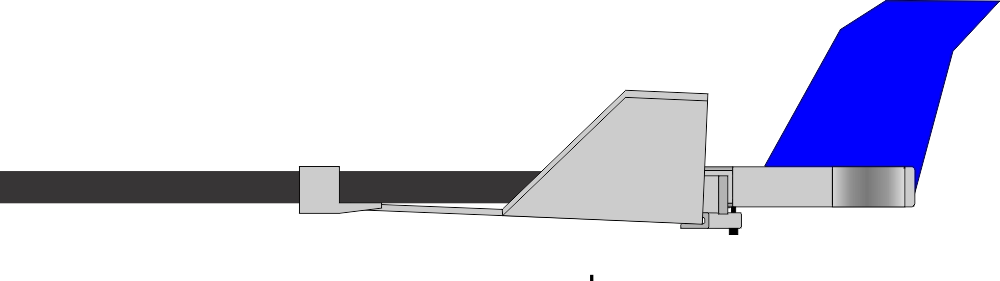
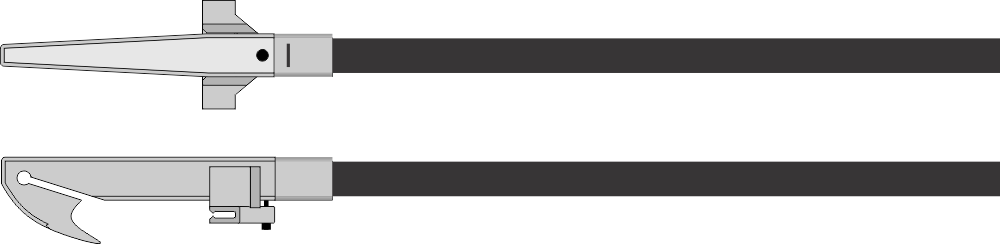
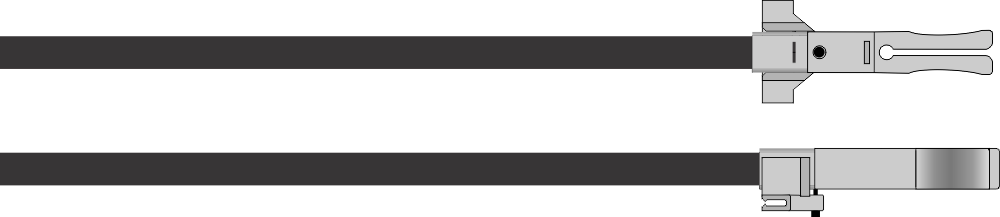
Attach the universal tips to the fuselage. Make sure the holes are going the same direction.

Place the Front Tip on the Universal tip. Make sure the hole in the front tip lines up with the hole in the Universal tip

Place the Tail Holder on the Universal tip. Make sure the hole in the front tip lines up with the hole in the Universal tip

Attach the Canard/ Wing Clip to bottom of the front tip. You will screw the M3 screw into the hole in the universal tip through the front tip.
Your content goes here. Edit or remove this text inline or in the module Content settings. You can also style every aspect of this content in the module Design settings and even apply custom CSS to this text in the module Advanced settings.
From the Template cut out the canard. Position both control surfaces so the flutes run left to right just like the wings.
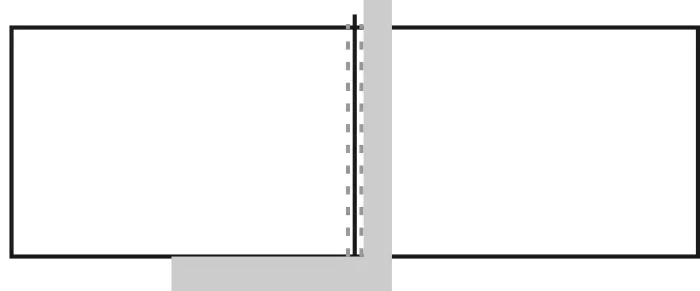
Now we need to make the hinge in the canard.
If you look at the canard, find where the angle meets the vertical side. (a)What we are going to do is cut the material on one side of the canard at this point, leaving the other side as a hinge as in b.
nsert the Canard into the slot on the front tip with the hinge cut facing down, lining it up with the fuselage so it’s centered.
Put the Back of the canard into the adjustment clip.
- Insert the wing into the Adjustment clip attached to the tail holder.
- Line the wing up with the fuselage using the lines you made earlier.
- Attach the middle clip at the front of the wing using the spike.
Using the template, cut the Vertical Stabilizer from the leftover pieces of substrate.
Insert Vertical Stabilizer (tail) into tail holder. If you want, glue it in. This is optional,
but it will need to be re-adjusted from time to time.